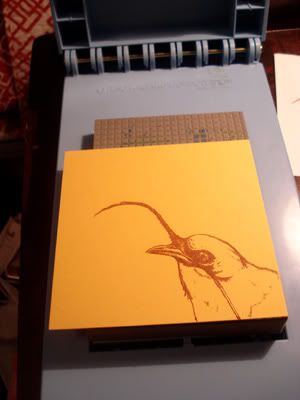
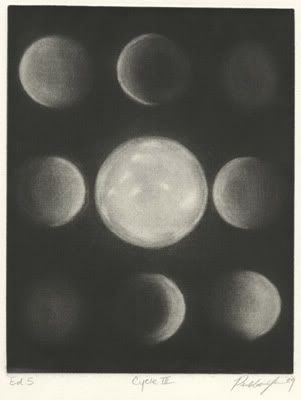
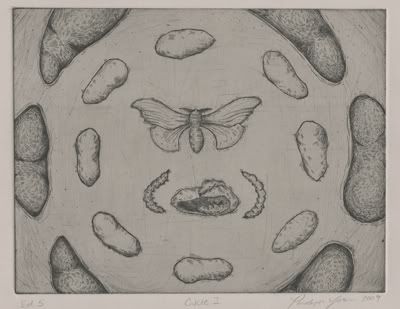
Monday, January 25, 2010

Tentacle Bird Gocco Prints

All I have to say is: this is way too much fun...and a dangerously addictive reason for me to acquire tons of awesome paper.

The image is from a sketch I did in my Natural History Drawing class last fall. Yes, it's a real bird--I can't take credit for coming up with the tentacle bird on my own. The drawing was done at the Harvard Natural History Museum and the bird is a Central American Bell-Bird.

Printed on 5"x5" curry colored cards (from Paper Source) in brown ink. Below you can see photos of the process.


Setting up to burn the master. You can see that the photocopy is placed on the grey padded area on the bottom part of the press.


After burning the master, with the original still attached.


Ink!


Setting up for the first "real" print (you can see my test print on the desk to the right).


Success! The paper looks orange in this photo...color in the next photo is more accurate.


And more success! I made a lot more prints than would fit on the rack...they ended up all over my bed and on various flat surfaces around my room.


I printed until the ink began running out. Here you can see a few bare patches.


Last but not least: CLEAN-UP. It wasn't fun, but I think I managed to get it clean. Holding it up to the light shows that the ink has been removed from the design area. I followed the steps on this page, which is part of a very helpful resource database called NEHOC.


I dub this experiment a success! Now where am I supposed to keep all these prints...

Friday, January 22, 2010

Going Gocco!

Today was very exciting because I am now the proud owner of a Gocco B6 Printer thanks to my friend Lanie! Since supplies are expensive, I've been carefully considering what I want to print. I'm hoping to create lots of cute stationary, recipe cards, and other awesome things including maybe small decorated fabric things like bags and aprons. So many possibilities, and I'm hoping that a bit of searching will lead me to some helpful/inspirational blogs and websites. Anyway, here are some pictures of the gocco!


The gocco and accessories in their box.


Inks and screen cleaner.


Here you can see my roommate posing with the gocco.


Lanie also gave me this little book of images that you can burn onto the screens. Lots of cute images of boars and Chinese characters that I can't read.


We tested out some screens that Lanie had made for her wedding invitations and stored in the fridge. Unfortunately they seemed too old to print and we decided to try burning a new image onto the screen. It wasn't totally successful but we still managed to print part of an old screen just to get an idea of how it works.

It seems like cleaning the screens is going to be the real challenge. I found this website (northwoodstudios.us) that sells gocco supplies, including their own formula of gocco cleaner called Goccogrrl Screen Cleaner. I think I'll give it a try, since the cleaner that comes with the gocco seems messy and expensive to replace.

Here is a video tutorial of how to use the gocco. It looks like these videos are from the 80's or something, and they're accompanied by horrible (read: hilarious) music, but the instructions are very clear and straightforward.


Hopefully I'll be making lots of awesome prints! Updates to come.

Cycle III


Title: Cycle III
Size: 8"x10"
Medium: Aquatint
Edition of 5 printed in black ink on white paper.

Of the three prints in the Cycle series, this one was the most time consuming to produce. However, it is by far the simplest in terms of concept. The phases of the moon--a grand cycle that can be seen all over Earth and that influences us and our world in more ways than we can imagine. I love how something so enormous can be contained within a neat grid, so deceptively simple.

Despite the straightforwardness of the concept, it was very difficult to create this image on the plate. Also--perhaps you've noticed already--you can see that I made the mistake of creating the image the wrong way. I should have made it backwards on the plate so it would print correctly (with the phases reading from left to right). Instead it reads from right to left. D'oh! Rookie mistake, right there.

I created this plate using aquatint. The plate was aquatinted and bitten to pure black, then areas that I wanted to be lighter were scraped and buffed to smooth out of the surface (producing the light areas that you see in the print). I created the circles by tracing the bottom of a cup and traced the top of the cup for the large full moon in the center. The rest was all scraping and sanding.

Although I like the simplicity of this print both in terms of design and concept, I am still unhappy with many small details. The phases do not smoothly transition into one another, and the edges of some of the crescents are wobbly and not as smooth as I'd like. I definitely want to try my hand at this technique again--at least now I have some idea of what I'm in for.

Thursday, January 21, 2010

Cycle II


Title: Cycle II
Size: 8"x10"
Medium: Soft ground etching on grey paper
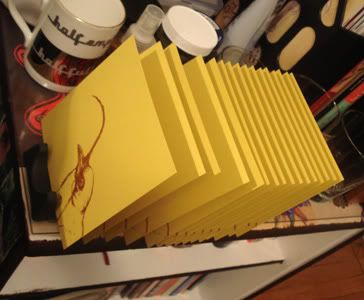
Edition of 5

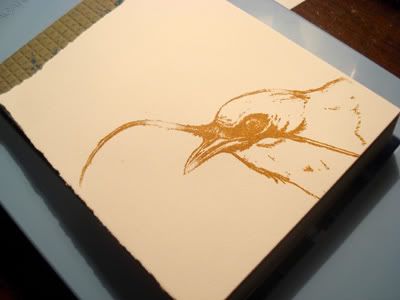
This is definitely my favorite of the Cycle series and I plan on printing one or two more editions on different types of paper and using different ink. Obviously, I was heavily influenced by Ernst Haeckel in the design of this image. However, rather than Haeckel's typical sea-creature and radiolaria imagery, I chose to create a composition out of male and female reproductive organs. Yes, the male organs are there! But they're a bit more difficult to spot than the female bits.

Initially my intention was simply to create a beautiful composition using hidden parts of our anatomy (parts that have an obvious connection to cycles, especially for women). However, as I continued to work on the plate, the imagery took on various meanings. I think it's interesting how the female organs are so prominent and central, with the male organs almost hidden--quite the opposite of how the male/female "duality" is usually perceived. I like that the "duality" is not as present here and that the two are intertwined (as, many would argue, they are in reality). Aside from the uterus and ovaries it is difficult to determine which organs belong to either sex. I chose to emulate Haeckel's compositions because of the fine balance and attention to detail--a beautiful synthesis of scientific and artistic vision. I wanted to display both the aesthetic and biological beauty of these aspects of ourselves.

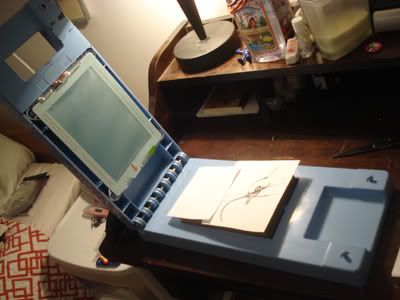
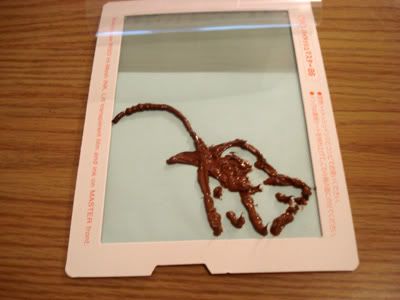
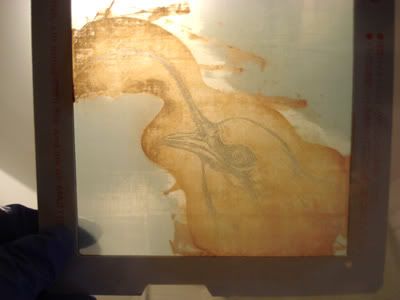
This plate was created using soft ground, which I had a lot of fun working with. The ground is applied by heating the copper plate and applying a few small dabs (at room temp, it is a thick, wax-like consistency). A roller is then used to distribute the ground in a very thin, even layer across the entire surface of the plate. I did this process three times to create the various layers of the plate (perhaps I will post in-progress images if I scan the proofs).

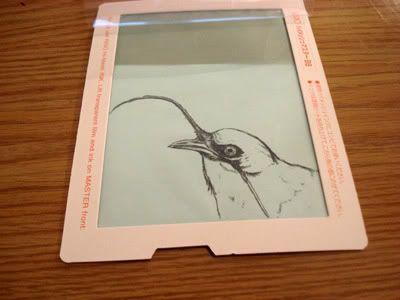
The first layer was the basic shapes of the organs, with a little bit of detail (drawn through tracing paper directly on the surface of the plate). The plate was then put in a chemical bath so the lines would be etched into the plate. The next layer involved a combination of both hard and soft ground. Soft ground was applied first, then I carefully painted in hard ground to cover the parts where I did not want the texture. I placed a piece of fabric over the entire plate, ran it through the press, and put it in a chemical bath so the texture would be etched into the entire plate except where there was hard ground. The last layer was soft ground again, with the details and darker tones; again, this was drawn on tracing paper with a pencil. The pressure from the pencil through the tracing paper was enough to create a line in the soft ground. One final chemical bath and viola!

I also printed a limited number of these in a purple-toned ink on grey paper, however, I think I prefer this one the most. Nonetheless, I look forward to experimenting with different inks and papers with this plate.

Tuesday, January 19, 2010

Cycle I


Title: Cycle I
Size: 10"x8"
Medium: Etching and drypoint in graphite ink on grey paper
Edition of 5

This was the first finished piece I created in Intaglio I last spring. We had to create three finished editions, and I ended up making a series of images about cycles. This image was derived from a display at the Harvard Natural History Museum that showed silk worms, cocoons, and the moth that eventually emerges. I was intrigued by the cyclic arrangement of the display's design and the beauty this imparted on creatures that normally are considered disgusting. The arrangement was austere and almost mystical, and I sought to capture that. Within the image, birth, the process of maturity, and death are all implied but also expand beyond the scope of the picture plane, reaching outward into the viewer's world.

Overall, I thought this print was quite successful--especially as a first attempt! However, I think its most apparent shortcoming is the textures on the cocoons, which could easily be mistaken for...er...something else. Especially since the colors don't help identify the object, the texture was a particularly significant aspect and I don't think I quite managed to capture the fine, soft texture of a silk cocoon.

In terms of process, this image was created on a copper plate with hard ground painted on the surface. After the ground dried, I used etching tools to "draw" the image on the plate's surface. The plate was then immersed in a chemical bath, which eats away at the copper that is exposed through the ground (that is, the parts that were etched away). After I finished etching the plate, I did some finer detail in drypoint (directly etching into the plate to create lines) and used sandpaper to create some texture around the edges.

Saturday, January 16, 2010

Appleman Screenprints

Ok, here are some progress shots of my appleman screen prints. A few weeks ago Louis and I went to New Haven. It was very cold so we didn't do much walking around...mostly jumped between lunch and coffee places to keep warm. While waiting for our lunch I started drawing Louis but it didn't look like him so I turned it into a totally ridiculous looking man. Louis said he looked like a lemon so I made his head lemon shaped. I ended up drawing a bunch of other fruit-people to go with him and appleman resulted from that.

It worked out because appleman was nice and simple, perfect for a test print. I'm considering this my first real attempt at screenprinting, although I've done it once before with absolutely no success. This time was better!

Materials:
-Speedball screen
-Screenfiller
-Magenta + Yellow acrylic Speedball inks
-Watercolor paper
-Squeegee
-Tape for the edges of the screen, front and back


Screen filler (the red stuff), painted on to block out areas not to be printed.


Done with the screen filler. A second layer was applied the next day to cover up any remaining pinholes.


Ink!!


APPLEMAN!!


I decided to add some watercolor afterwards to make him even more disturbing.

First Post

I'll be using this blog as a place to post finished work, progress shots, and information about my process (including, I hope, many inspiring revelations).

Let there be art!